To configure DRM for a site, follow these steps:
- Open the site you want to configure DRM.
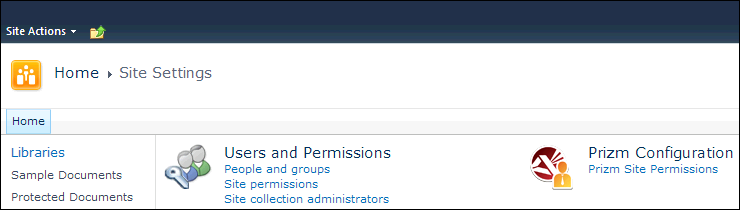
- Click on Site Actions, then click Site Settings.
- Under the Prizm Configuration heading, click on Prizm Site Permissions:
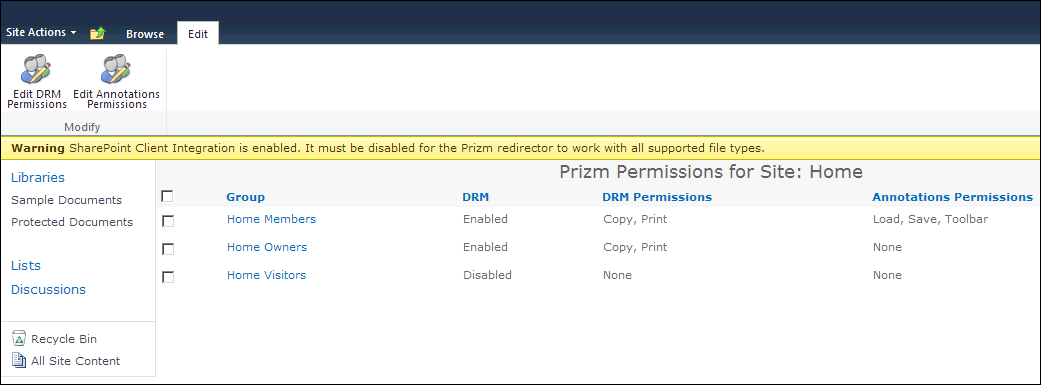
- The Prizm Permissions page for the site displays. The table on this page shows the DRM permissions and annotations permissions that are currently set for each group. Select one (or more) groups to configure for DRM and then select Edit DRM Permissions:
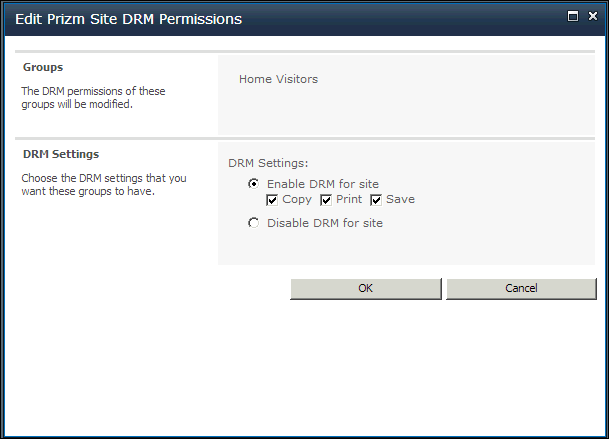
- The Edit Prizm Site DRM Permissions window displays. Under DRM Settings, select the Enable DRM for site option and then check Copy, Print and/or Save as desired:
 |
If no groups are selected when you select Edit DRM Permissions, the Edit DRM Permissions dialog will include a People Editor you can use to specify which groups the settings apply to. |
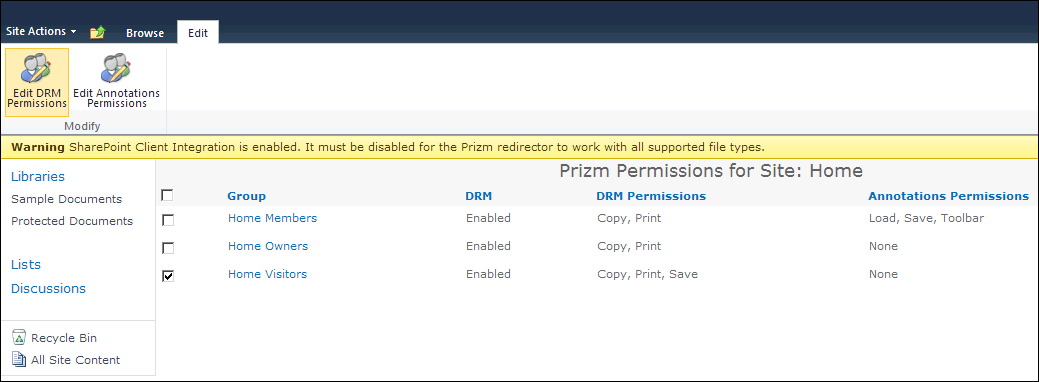
- Click OK and your settings are saved. You will be able to view the new settings in the DRM and DRM Permissions columns on this page:
 |
If you want to configure DRM for another site, repeat these steps. |